Digital resource
A beginner’s guide to artwork photography
Art centre staff routinely take photos of artworks for documentation purposes and often high-quality images are needed for marketing or merchandising opportunities. By making sure you have the right equipment and set up, you can be confident in having professional-looking results. Remember, practice makes perfect!
Expert tip: It’s handy to have a dedicated photography space in your art centre, so it is always set up and ready to go! This will minimise time spent getting organised and packing down

By making sure you have the right equipment and set up, you can be confident in having professional-looking results.

Indoors or outdoors?
Indoors is best for consistent lighting and white balance. Outdoors can be good for telling the story behind the art, showing the setting in which the artworks were created and have a cultural connection to. This provides more context for the audience and can make for interesting social media content. If you only have room to shoot outdoors, make sure you choose an overcast day or shaded spot as direct sunlight can wash out colours and produce harsh shadows in your photos.
What you’ll need
- Reliable laptop
- Photo editing software (Canva Pro is free for NPOs and Adobe Creative Cloud, which includes Lightroom and Photoshop, offers discounted memberships)
- Full-frame camera (50mm to 105mm lens offers the least distortion), with tripod. If this is not possible, an iPhone or iPad will work surprisingly well
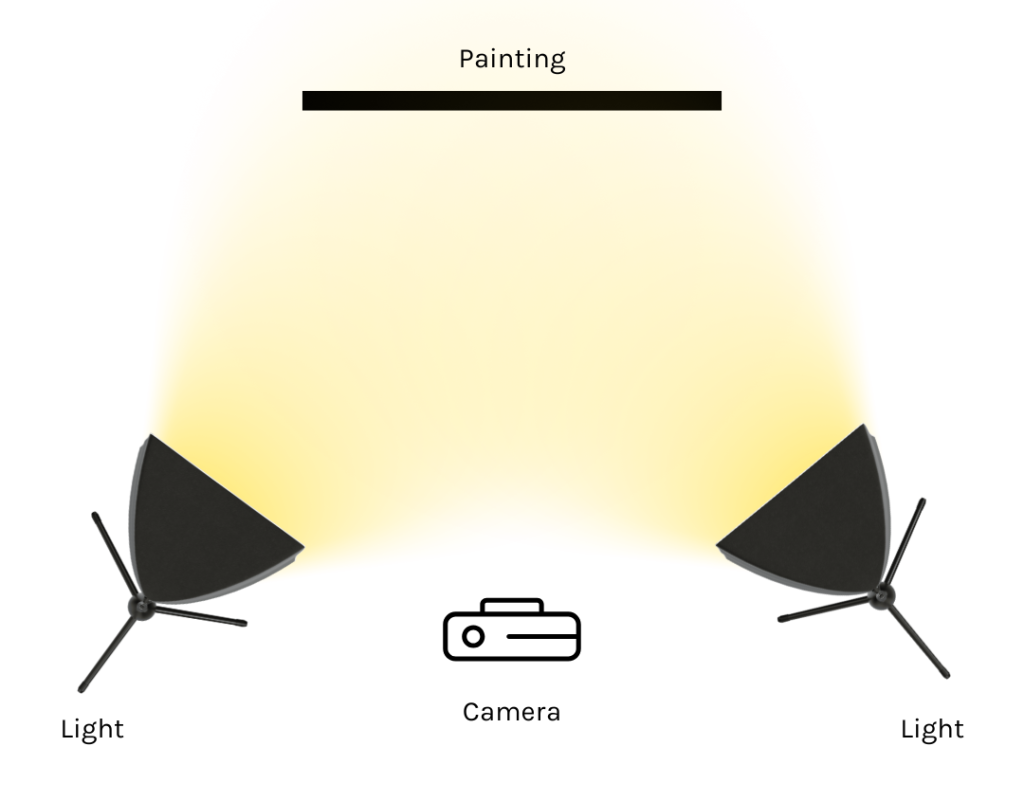
- Two off-camera flashes, continuous lights (e.g. LED monitors) or a reflector (if using natural light) with tripods
- White/grey card or something to measure white balance
- Fully white or black background (can be a curtain, card or even a blank wall)
- If you have budget, purchasing a backdrop stand can be a good investment – they generally include stands, a crossbar, and sturdy spring clamps to hold the canvas securely.
Expert tip: Don’t worry if you don’t have all the items; just work with what you have. There is nothing wrong with using a stack of books in place of a tripod, for instance.
Product photography checklist
- Make sure you have a neutral background without distractions or clutter
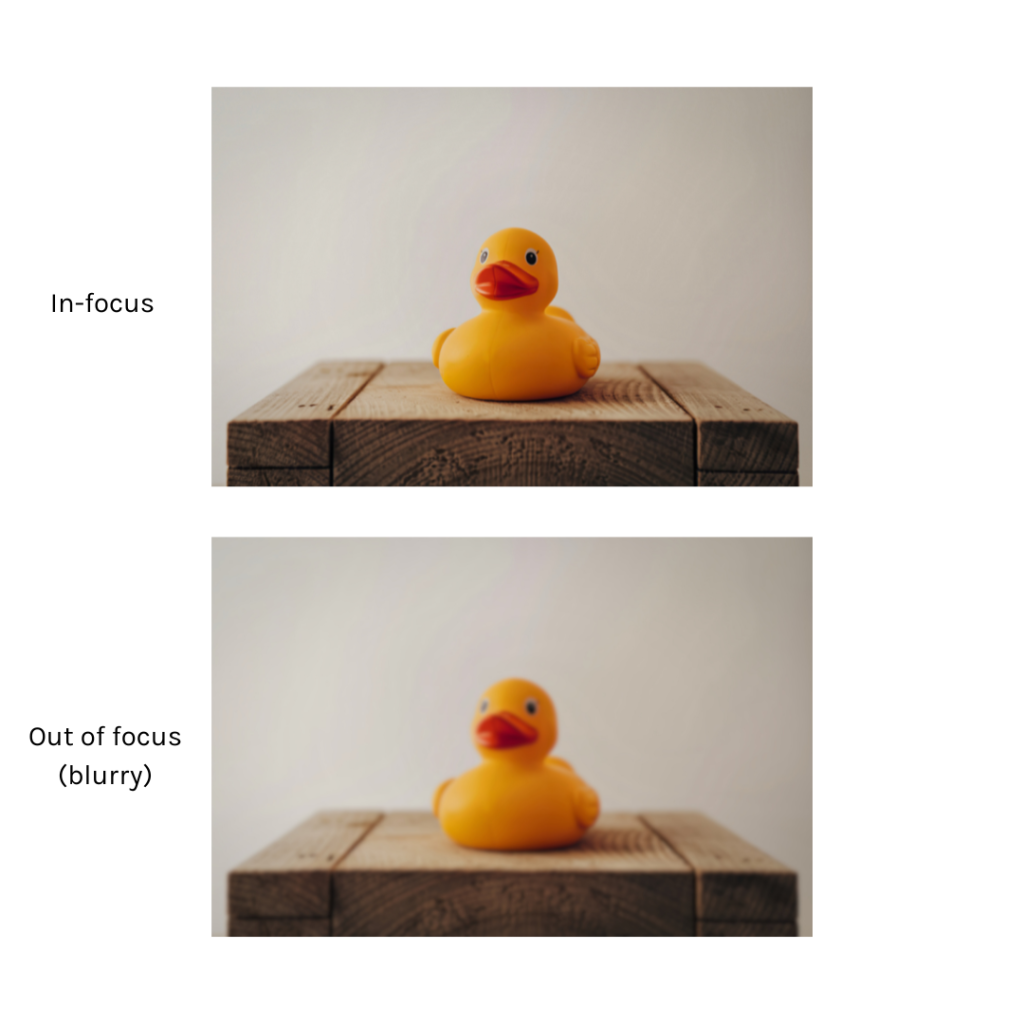
- Make sure your artwork is in focus
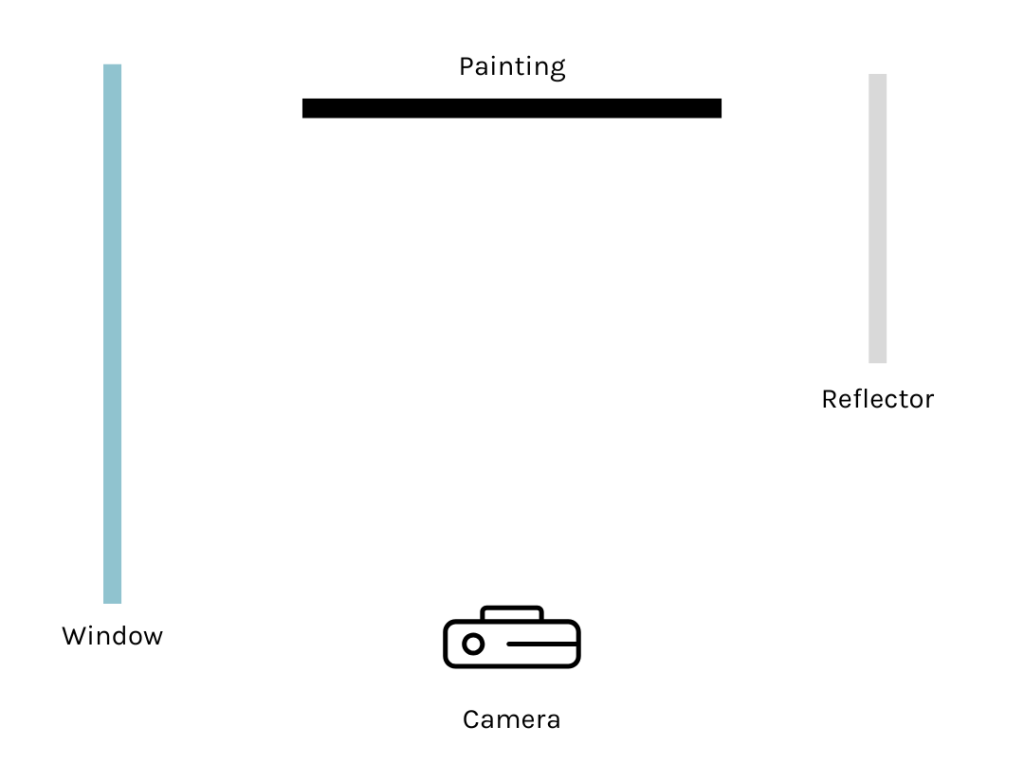
- If you aren’t using lights, set up your artwork near a source of bright, indirect light like a window
- Consider the rule of thirds; check that your artwork is centred and flat in the frame
- Make sure you have a flat surface (tripod, table etc) to keep the camera steady
- When editing, crop your photos to remove excess white space and focus the viewer’s attention on your product
Don’t worry if you don’t have all the items; just work with what you have.
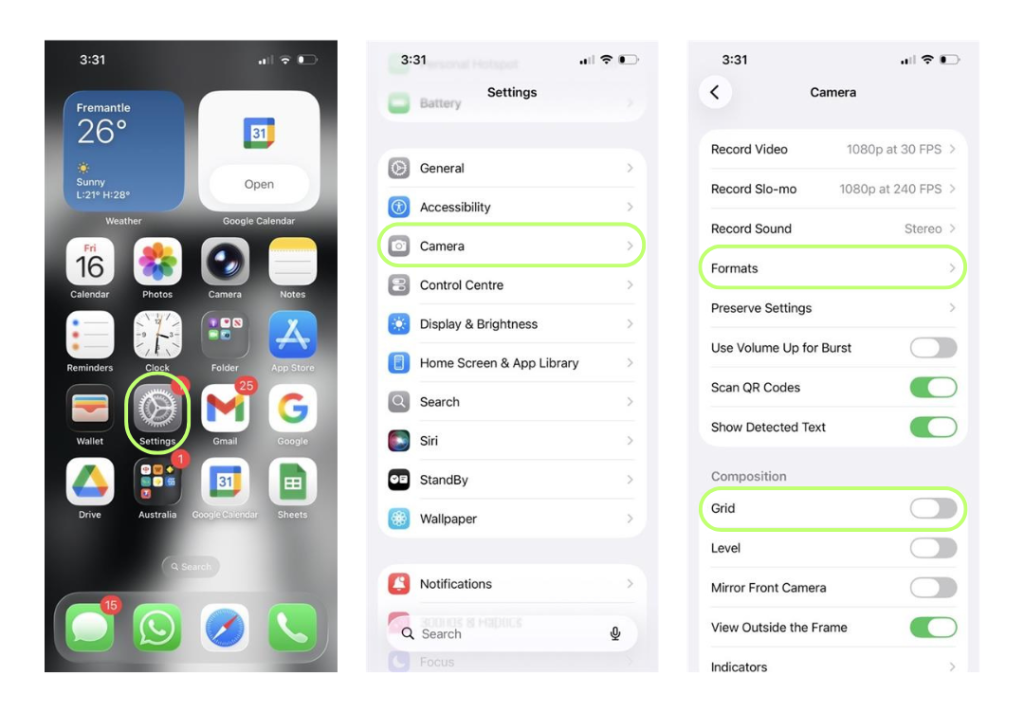
iPhone & iPad tips and tricks
- Avoid zooming in on a phone camera as this reduces the image quality
- Make sure your flash and live photo mode are turned off
- In your camera settings (accessible through phone settings), set up your format to ‘most compatible’; this will capture higher quality images
- Turn on your grid display; this will assist in positioning the artwork within the frame
- Tap on the artwork to ensure that it is in focus
- Set up a three-second timer to capture multiple photos at once
DSLR camera tips and tricks
- Shoot everything in RAW format. These files contain the most information and can be blown up to the largest size without losing image quality.
- If you know your images are to be printed, export them to TIFF format. If your images are for archiving, export to RAW with applied edit settings, which means you’ll never lose the ability to do what you need to do with them in the long run.
- Shoot in low ISO, ideally 100, for cleaner, sharper images to ensure that texture or digital grain isn’t unintentionally added to the artwork.
- Use a medium aperture range eg. f8 to f11; anything higher will require you to make a lot of light or several adjustments to other settings.
- If you are using a camera tripod, you can set the shutter speed as low as you need. Lower is often better for larger artworks.
- Remember, you will always need to move the flash slightly depending on the size of the artwork, if it’s hanging up, or is in 3D, or is dark/anti-reflective. Experiment with your lighting setup to get the best results – sometimes it takes 100 shots to get the one good photo you need. That’s ok.
For some definitions and more helpful tips and tricks, click here
[This resource was created 25 February 2026 in collaboration with Cole Baxter.]
The information provided in this resource is for general informational purposes only. AACHWA assumes no responsibility for errors or omissions in the content or for any actions taken based on the information provided. Links to external websites are provided for convenience and do not imply endorsement. AACHWA is not responsible for the accuracy, reliability, or content of third-party websites. Use of this website is at your own risk, and AACHWA is not liable for any damages arising from its use.
Have a question?